ParticleSystem
- author:
- Daniel Sperl
- description:
- Particle System for special effects
- compatible:
- v2.0
- tag:
- particles, effects, 71squared
- homepage:
- https://github.com/Gamua/Starling-Extension-Particle-System
Overview
This class provides an easy way to display particle systems.
Particle Systems can be used to create special effects like explosions, smoke, snow, fire, etc. To provide that flexibility, it can be configured with numerous settings that control particle movement, size, color, etc.
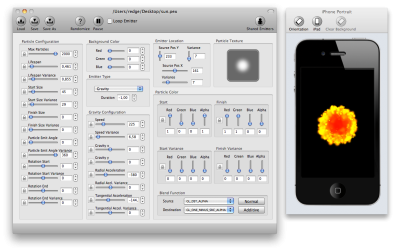
Finding the perfect settings for your effect is not easy. For that reason, there are tools that allow you to modify the settings and preview the resulting particle system in real time.
- Particle Designer, the original from 71squared. It's a great tool that contains access to a large online library of free emitters. Warmly recommended for any OS X user!
- Particle Editor is a free online tool built with Starling. It lacks the online emitter library, but allows editing and previewing directly within the browser. (More info here.)
- Update 2021: now that the Flash Player is no longer available, you can download an updated version of the above particle editor in this new fork.
Sample Project
The demo-directory contains a sample project with four sample configurations. Switch between configurations in Demo.as by hitting the space key.
The following sample configurations are provided:
- drugs.pex
- fire.pex
- sun.pex
- jellyfish.pex
Usage
The extension contains two Particle System classes:
- “ParticleSystem.as”: A generic particle system. Use this as a base class if you want to create a custom Particle System (for advanced users).
- “PDParticleSystem.as”: This is likely what you want to use: a particle system that can be configured using the editors described above. ('PD' stands for 'Particle Designer'.)
// embed configuration XML
[Embed(source="fire.pex", mimeType="application/octet-stream")]
private static const FireConfig:Class;

// embed particle texture
[Embed(source = "fire_particle.png")]
private static const FireParticle:Class;

// instantiate embedded objects
var psConfig:XML = XML(new FireConfig());
var psTexture:Texture = Texture.fromBitmap(new FireParticle());

// create particle system
var ps:PDParticleSystem = new PDParticleSystem(psConfig, psTexture);
ps.x = 160;
ps.y = 240;

// add it to the stage and the juggler
addChild(ps);
Starling.juggler.add(ps);

// change position where particles are emitted
ps.emitterX = 20;
ps.emitterY = 40;

// start emitting particles
ps.start();

// emit particles for two seconds, then stop
ps.start(2.0);

// stop emitting particles; the existing particles will continue to animate.
ps.stop();

// stop emitting particles; the existing particles will be removed.
ps.stop(true);
Batching
You can batch identical particle systems together, i.e. particles that use the same texture and blend mode. To do this, first enable the batchable property:
ps.batchable = true;
In most cases, this alone won't work, though. You will also need to configure the parent sprite to use the same blend mode. Like this:
ps.parent.blendMode = ps.blendMode;
Yeah, I know – that's weird. The reason is to be found in Starling's render logic. When Starling iterates over the display list, it jumps from child to child. In pseudo code:
sprite.render() { // blendMode = "normal"
  pushState();    // store blend mode
  ps1.render();   // blendMode = "custom"
  popState();     // restore blendMode = "normal" <- !!!
  pushState();    // store blend mode
  ps2.render();   // blendMode = "custom";
  popState();     // restore blendMode = "normal"; <- !!!
}
As you see, whenever there's a “popState” call (i.e. the old render state is restored), the blend mode switches, and this causes a draw call. To avoid this, we need to set that same blend mode on the parent sprite.
Low FPS situations
The particle system tries to do its best to lead to correct output even when the frame rate is becoming low; it always takes the actual frame time into account when, for example, moving or spawning new particles.
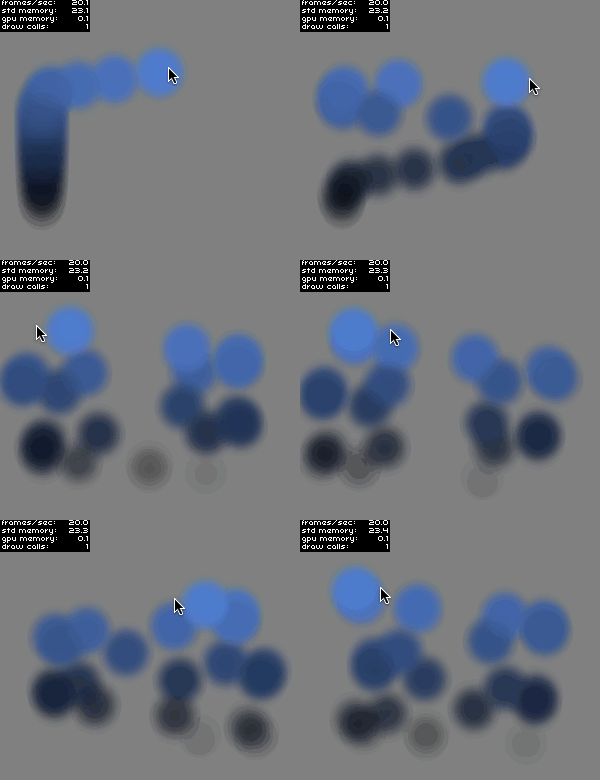
That's not so easy, however, when you animate emitterX and emitterY yourself (e.g. via a tween or mouse events). If those properties are animated while the frame rate is low, particles will often lump together, which doesn't look good.
For this reason, there are now two additional properties called emitterNextX and emitterNextY. If you set those values, the emitter position will be gradually moved over the course of the next frame (think of it as sub-frame tweening, if you want). That means that if, say, 10 particles are created in the course of the next frame, their spawning positions will be spread between the old and new emitter position.
The animations below show the difference; both of them are running with 20 fps.


Rendering directly on top of the stage
Beware that if your particle system is displayed on top of an empty area on the stage, it might look a little strange. That's because, per default, that empty area has an alpha value of “zero” (which makes sense, since it's empty), and some of the blend factor combinations need a non-zero alpha to start with.
That's easily solved, though: the stage's color property actually includes the alpha value that's used for clearing the back buffer. Change it to the following value:
stage.color = 0xff000000; // 0xAARRGGBB
That will make sure that those empty pixels have an alpha value of 1.0, and everything will be back to normal.
Remarks
Not touchable
The particle system's bounds are always a zero-sized rectangle, because calculating the real bounds would be very time-consuming. That means that you can't touch a particle system.
Particle Designer: emitter location ignored
The emitter location you can set in the Particle Designer is ignored, too. To move the particle system around, change the x- and y-properties of the particle system, or the emitterX- and emitterY-properties at run-time. (While the former moves the complete coordinate system around, the latter just changes where new particles appear.)
Particle Designer: systems are upside-down
Furthermore, the movement of particles is upside-down in Starling, compared to the Particle Designer. That's because Starling uses another coordinate system (with the origin at the top left). To work around that, you can either set the “scaleY” property of the particle system to “-1”, or design the particle system upside down.
Need more options?
The Starling user Michael Trenkler created an advanced version of this particle system class, which adds tons of additional features. So if you're looking for more control over you particle systems, definitely have a look at his Improved Particle System!
Changelog
- 2011/09/02: First public version
- 2012/01/03: Dispatching Event.COMPLETE
- 2012/02/08: added properties for all settings
- 2012/02/27: compatibility with Starling 1.0
- 2012/04/05: Fixed color overflow error (output was different than PD preview)
- 2012/04/28: Added support for rotated particles
- 2012/05/13: fixed massive mem-leak caused by strange Flash Player phenomenon
- 2012/07/18: added support for the
drawCountstatistic - 2012/10/25: added 'pause' method, made texture property writable
- 2012/11/06: added support for ATF textures
- 2013/08/05: fixed that particles initialized with a zero lifetime were being displayed
- 2013/08/20: compatibility with Starling 1.4
- 2013/10/02: added 'smoothing' property
- 2016/02/18: added Starling 2.0 version
- 2016/04/12: compatibility with latest Starling head revision
- 2018/09/11: fixed how emission rate is calculated (→ more uniform spawning)
- 2018/09/12: added
emitterNextXandemitterNextYproperties
Source Code
You can browse the source code of the particle system on its GitHub page.
User Comments
Feel free to edit this part of the page if you want to add information that's lacking in the above description.
Questions are better asked in the forum, though.
